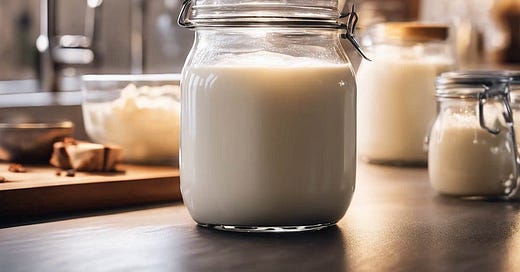
How to Make Milk Kefir at Home: The Ultimate DIY Guide for Probiotics
Fermented Superfood: How to Make and Use Milk Kefir
Adding milk kefir drinks to my daily diet for over a year has been a great experience and has positively affected my general health. I’ll show you how to make your own at home and some of the health benefits it provides.
Often the question is asked, ‘What is kefir?’
Offering more than the typical kefir benefits, this fermented drink is filled with various microorganisms, essential vitamins, and minerals that can help improve gut health.
Health Benefits of Milk Kefir
Probiotic Superstar
Known for its high probiotic content, milk kefir is a powerful way to balance the gut microbiome. These probiotics promote the proliferation of beneficial bacteria while inhibiting harmful microbes, improving digestive wellness.
A healthy gut flora increases better nutrient absorption, improved digestion, and a stronger immune system.
Better Digestive Health
Among the probiotics found in milk kefir are Lactobacillus kefir and Bifidobacterium strains.
Milk kefir, with its complex and abundant probiotic profile, can contain an impressive selection of up to 61 different bacteria and yeast strains, though this number can fluctuate.
Consuming these probiotics can reduce irritable bowel syndrome (IBS) symptoms and other digestive disorders.
Rich in Nutrients
As a superfood powerhouse, milk kefir is filled with vitamins and minerals. It’s packed with essential nutrients like calcium, which helps bone health, and magnesium.
Additionally, it’s a rich source of B vitamins, including B12, crucial for efficient energy metabolism.
Enhanced Immune System
The probiotics in milk kefir play a vital role in boosting immunity, making the question ‘is kefir good for you’ a resounding yes.
By fortifying the body’s defenses, kefir may reduce the severity of sickness and help ward off infections.
Regular consumption of milk kefir, which can be nearly wholly lactose-free, is associated with decreased activity of allergies, autoimmune disorder flares, and respiratory infections.
Help with Lactose Digestion
People with lactose intolerance often struggle to digest lactose, the sugar in milk. The fermentation process of milk kefir transforms lactose into simpler forms, potentially making it easier for those with lactose intolerance to enjoy dairy without discomfort.
This suggests that homemade milk kefir could be considered nearly lactose-free and a potential option for diabetics due to its reduced sugar content.
However, it’s important to note that some store-bought kefir products may contain added sugar.
Benefits for Mood and Mental Health
The significance of a healthy gut-brain axis for overall wellness is being increasingly recognized.
The probiotics in milk kefir can contribute to health benefits by balancing gut flora and enhancing mental and emotional health.
Emerging research indicates a link between a robust gut microbiota and fewer symptoms of anxiety and depression.
Weight control
Consuming fermented dairy products like milk kefir may help with weight management. Some studies suggest probiotics can influence appetite regulation and metabolism, assisting in weight loss and maintenance.
DIY Guide to Making Homemade Milk Kefir
For over a year, I’ve been dedicated to learning how to make kefir, using the same original kefir grains I initially purchased.
These grains have been the cornerstone of my milk kefir production journey.
***Product Recommendation: Lifetime Kefir Milk Kefir Grains
When I was learning how to make kefir, so many directions I encountered made it seem difficult. After a year of milk kefir fermenting, many instructions are WAY overly complicated!
Tools needed
1–2 tablespoons of grains for milk kefir
Two cups of whole organic milk
A quart glass jar
A filter or piece of cloth that breathes
A large rubber band
A wooden or plastic spoon (do not use metal)
Purchase reputable kefir grains — Lifetime Kefir Milk Kefir Grains from a reliable supplier. These tiny gelatinous structures, teeming with yeast and bacteria strains, are the powerhouse of probiotic food and fermentation.
2. Select Your Milk: The type of milk you choose directly affects your kefir's flavor and nutritional profile. Opt for high-quality, ideally organic whole milk to ensure a rich and nourishing final product.
Avoid overly processed milk varieties, as they may hinder the fermentation process. A full-fat organic milk is recommended for milk kefir.
Instructions:
Begin your milk kefir recipes by placing the milk kefir grains into a clean, quart-sized glass jar.
Gently pour cold, whole organic milk up to the neck area of the jar. Precision isn't crucial, as the ratio is typically 1–2 teaspoons of kefir grains for every 2 cups of milk.
The kefir will naturally self-adjust, so there’s no need for exact measurements.
Secure a breathable cloth or coffee filter over the jar with a rubber band to protect your fermented drink. This barrier is essential to keep contaminants at bay while still allowing for necessary air circulation.
Avoid airtight lids since the fermentation process releases gases that need to escape.
Allow the milk and kefir grains to ferment at room temperature, which is best between 68 and 78°F (20 and 26°C). This fermented milk transformation can range from 12 to 48 hours.
As the kefir ferments, it thickens and develops a solid top layer. A longer fermentation time will yield a tangier taste, indicating further reduced lactose and increased probiotics.
It is normal if it starts to separate. Just pour it into your gallon jar and chill. Stir it before putting it into your smoothies or serving it another way.
When I started making my DIY kefir at home, the thought of leaving milk out for 1–3 days was initially off-putting, thinking of spoiled, foul-smelling milk.
Recognize that fermentation is not rotting. The smell carries an earthy, clean aroma that I enjoy.
Once your kefir has fermented to the desired degree, transfer it to another clean jar for refrigeration, which stops the fermentation process.
I prefer using a glass gallon jar or a 1/2 gallon jar to hold the finished kefir. It is perfect for blending into smoothies later or enjoying as a drink that supports cholesterol management.
When making a new batch of milk kefir, you may notice some grains stuck to the sides of the original quart jar after pouring it into the gallon jar. Leave them there.
If there aren’t any, use a wooden or plastic spoon to transfer a few tablespoons of your finished kefir back into the quart jar. Refill with fresh milk, as you did in step 3, and repeat the procedure.
One note about temperature and seasons: during the summer, when the house is warm, fermenting will happen much faster, about 24 hours or less, the warmer it is.
During winter, the opposite happens. If your kitchen is cool, get a heating mat wrap for your fermenting jar.
Due to the cold environment, you don’t want to ferment for 3–5 days or more.
Using Finished Homemade Milk Kefir
Kefir can be enjoyed naturally or enhanced with spices, honey, stevia, or fruits. These additions can improve its flavor.
For those who enjoy kefir milk or milk kefir, my favorite way to use it is to blend it into daily smoothies.
I combine water, frozen fruits, stevia, a handful of greens, and about 2 cups of kefir in a blender. It is a slightly bubbly, tangy, and delicious drink packed with vitality for my health.
Advice and Things to Think About
Experimenting with different types of milk, such as cow’s, goat’s, or sheep’s milk, can introduce various tastes and nutritional benefits to your kefir. Each variety offers a unique twist on this traditional fermented beverage.
You can modify the fermentation time to suit your taste. Longer fermentations yield a tangier taste, while shorter ones produce a milder flavor, allowing you to tailor it to your preference.
Hygiene is important in making kefir: ensure your jars, utensils, and equipment are clean and well-rinsed.
While it’s not necessary to sterilize your jars after each batch, a routine cycle in the dishwasher every few uses is sufficient. Allow the fermenting jar to return to room temperature before starting a new batch of kefir.
The milk kefir grains will flourish, increasing in size as they mature. Share extra grains with friends, or blend them into smoothies for a creamy texture — a favorite method of mine.
Healthy grains will appear clear, full-bodied, and have a gel-like consistency.
Here is a list of some of my favorite Kombucha and Kefir Making Supplies.
By Val Garner - all rights reserved.
This article contains affiliate links and I may receive a small commission after you click one of the links, at no extra charge to you.